
The ability to efficiently send multiple attachments using power automate via email is crucial. This blog post will guide you through the detailed process of achieving this using the powerful capabilities of Microsoft Power Automate. Whether you’re sharing documents, images, or other essential files, this feature ensures a more versatile and streamlined communication experience.
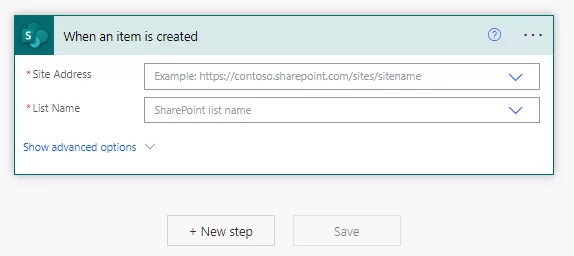
Step: 1 Add the “When an item is created” action.
Step: 2 Select the Site address and List name where an item, along with its attachments, will be added.
Step: 3 Add the “Initialize variable” action.
Assign a name to the variable, such as “AttachmentArray,” and specify its type as an array. This variable will be used to create an array containing all the attachments of the newly created item.

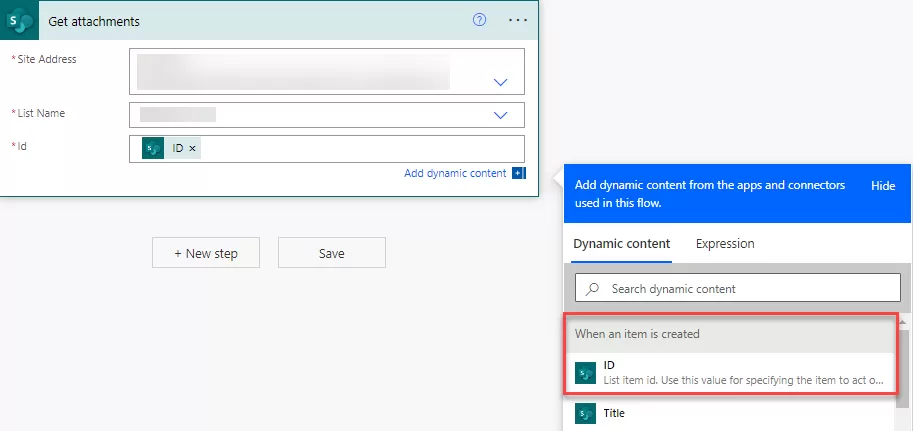
Step: 4 Add another action “Get attachments” and add the Site Address and List Name. Set the “Id” field to the ID of the “When an item is created” trigger using the Dynamic content available on the right, as shown below.
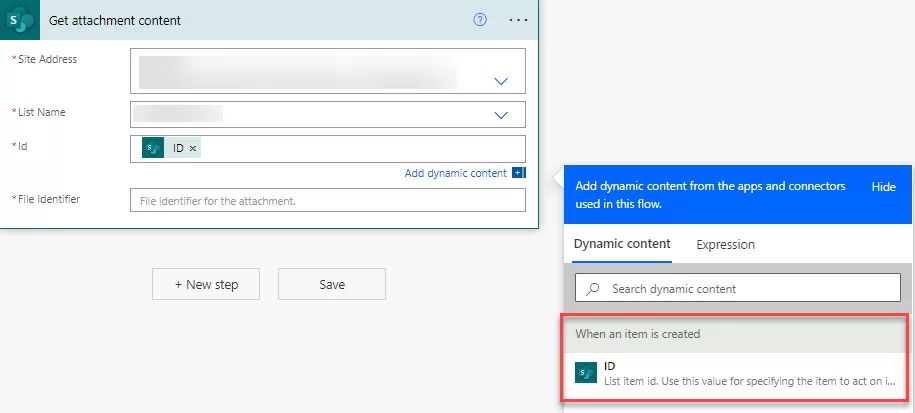
Step: 5 Add an action “Get attachment content” and select the Site Address and List name. Set the “Id” to the ID of the “When an item is created” trigger from the Dynamic content displayed on the right.
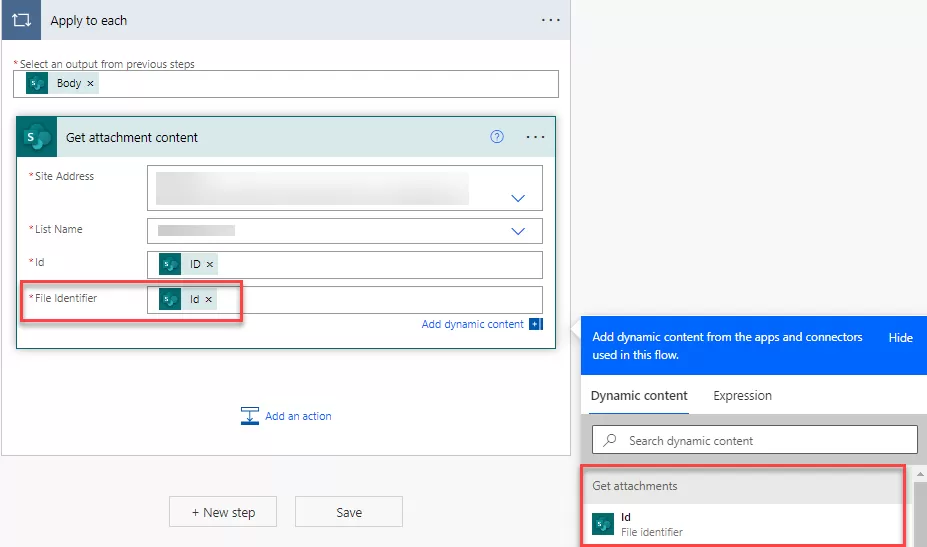
Step: 6 Set the file identifier to the ID obtained from the Dynamic content of the “Get attachments,” as illustrated below. Once users set the File Identifier, an “Apply to each” loop will be added automatically to retrieve the attachment content for each file.
Step: 7 Insert the “Append to array variable” action after the “Get attachment” action, within the “Apply to each” loop. Choose the variable “AttachmentArray” as the name, which was created at the beginning of the flow.
Assign the Value to the following JSON structure:
- Name: DisplayName of the “Get attachments”
- ContentBytes: Attachment content of ‘Get attachment content’.
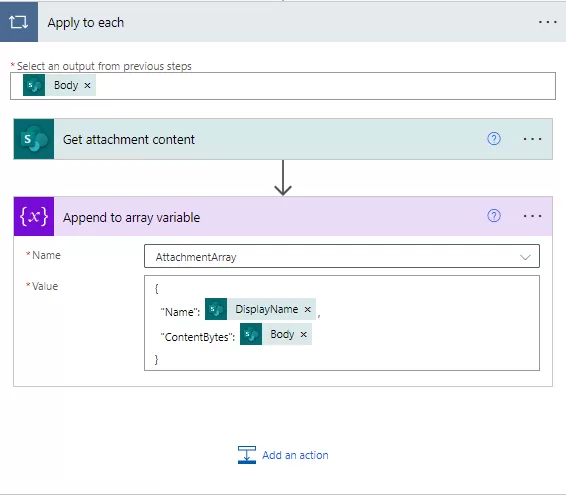
{

"Name": @{items('Apply_to_each')?['DisplayName']},

"ContentBytes": @{body('Get_attachment_content')}

}
Step: 8 Last, add an action “Send an email”. Additionally, include the ‘Subject’ and ‘Body’ for the email.
Set the value of Attachments to AttachmentArray variable.
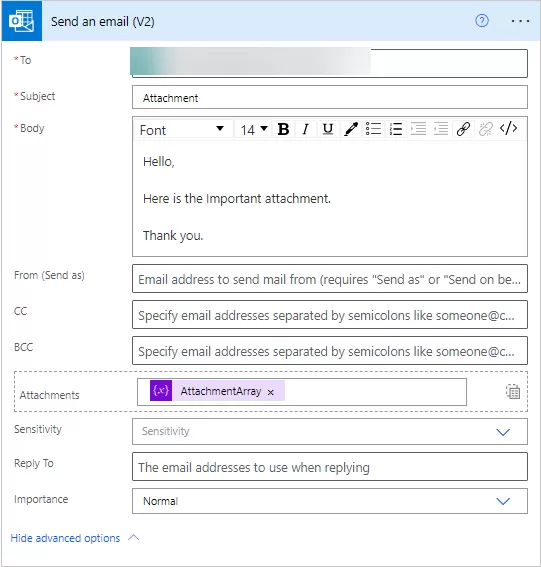
Step: 9 The setup of the flow concludes in just a few simple steps.
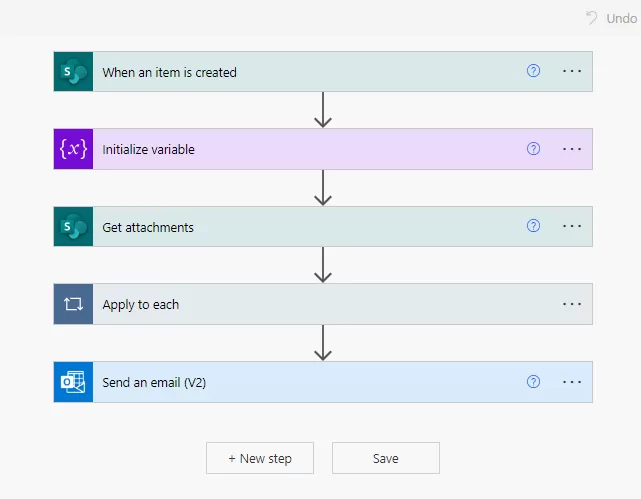
Step: 10 Generate a new entry in the SharePoint list and attach multiple files to it. An item has been created and three attachments have been added to it. Users will receive an email with the attachments, as illustrated below.

Conclusion: In conclusion, Power Automate offers a user-friendly and powerful solution for sending multiple attachments in emails. By following this step-by-step guide, you can enhance your email communication experience, making it more efficient and versatile.
Want to talk?
Drop us a line. We are here to answer your questions 24*7.


