
Process for creating MS Office Add-In from Visual Studio IDE
Step 1:
To start constructing an Office add-in, we are going to create a separate project for each Office application i.e. Word, Excel, PowerPoint etc. Let’s start with the MS-Word add-in. Open Visual studio with the IDE option FILE -> New -> Project:
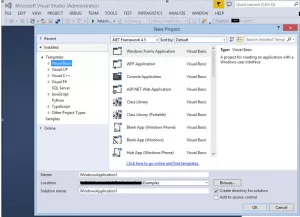
Step 2:
Now select an appropriate template (i.e. Visual Basic, Visual C# etc) to develop an add-in project. We will select Visual Basic for this, Go to Templates -> Visual Basic -> Office/SharePoint.
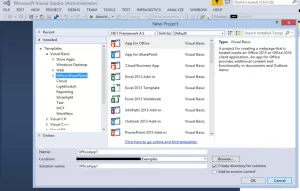
Step 3:
Now select the appropriate add-in project to develop as shown in the screenshot below. Let’s select the MS-Word add-in project, for example.
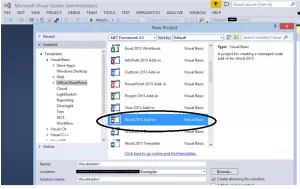
Step 4:
Name the project and select the ‘Location’ folder to save the project work. Click ‘OK’ button to create the project.
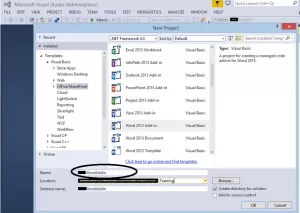
Step 5:
Now we have to add a ribbon to this newly created project which will then be customized further. To add a ribbon, right click on the project, Go to Add -> New Item… Then select ‘Ribbon (Visual Designer)’ component as shown below:
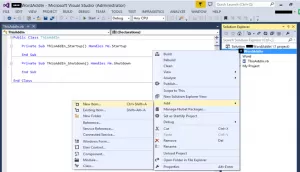
Select ‘Ribbon (Visual Designer)’ ->

Here’s how it looks after adding the ribbon into the project:

Step 6:
Now that the ribbon add step is done, we will proceed with customizing the ribbon. To design/customize the ribbon, we use the ‘Toolbox’ controls as shown in below screen shot.
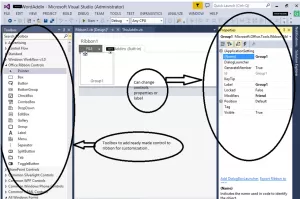
After customization of the ribbon, we have added one button with an image and label ‘Upload File’. We can then trigger the opening of a form on detecting the click of this button.
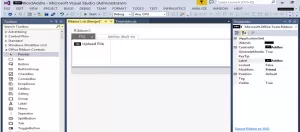
Step 7:
Now we will add a form for processing our logic to upload the file from the user’s machine to the server. To add a windows form, right click on the project, Go to Add -> New Item… Then select ‘Windows Form’ component as shown below screen-shots:
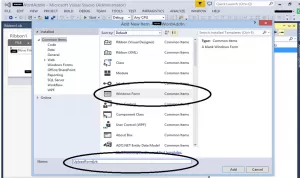
Below is the Design form for the move file action using toolbox controls:

Step 8:
Write logic to process/move the opened file to the server on the click of the ‘Move Document’ button. Process followed in current Office add-in is as below:
1. User will open his/her document in the MS-Office application
2. After the document is opened, if the user wants this to transfer to a website location, the User can go to the Add-In section and click the ‘Move Document’ button.
3. From step 2, a form will ask for the ‘site URL’. Based on this we can find the service location from the server which is located at ‘http://{siteurl}:{port}/Services/UploadService.svc’
4. After click on the ‘Move Document’ from form –
4.1. Copying current/active file opened in Word (or Office) application into the TEMP location of the user’s machine to read all file contents in bytes. This is because we can’t read in the stream of bytes directly if the file is currently in use.
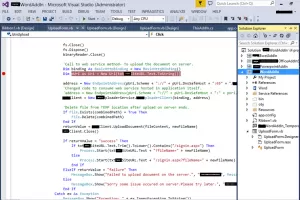
4.2. Next we read the contents from the file newly located in the TEMP location. Pass this bytes[] to the service method UploadDocument(fileContent, newFileName) in fileContent parameter and the file name us generated to process in the UploadDocument method.
4.3. After bytes[] stream is passed to the service method, it will write to the file in the TEMP location on the server which will be used to process or attach that document to the record based on the selection.
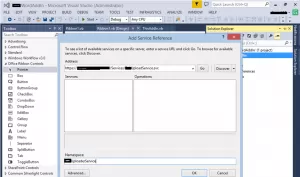
To add the service, right click on the project, Go to Add -> Service Reference…
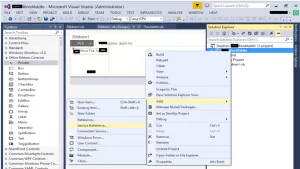
Configuring service reference in the add-in project:
The Code below is added on the click action of the ‘Move Document’ button from our windows form:
Office Add-In Installation
To install the MS Office add-in, Go to your setup location folder and click on setup.exe. This setup will install add-ins for Word, Excel, and PowerPoint applications:

Screen-Shot: After installation of add-in setup:

Screen-Shot: Form to move the document to the server:
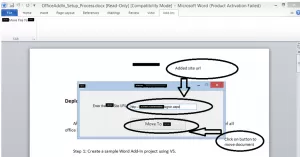
Press the “Move” button and it will open the site associated with the entered URL in the browser. The other upload document process will handle the entered website.
For MS-Excel and MS-PowerPoint we can follow same steps.
Want to talk?
Drop us a line. We are here to answer your questions 24*7.


