


Summary
In this blog post, I share the steps for creating the custom template for any SharePoint Online site
Now let’s start building the custom template, for which we will run the following commands.
Step 1
First create any SharePoint site.
Step 2
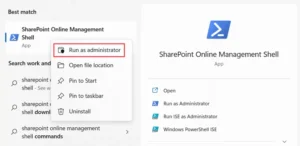
Install “SharePoint Online Management Shell” and open as “Run as Administration”
Step 3
Connect SharePoint tenant using following command.
Tenant Admin Url – https://anyorganization-admin.sharepoint.com/
Connect-SPOService -url “Tenant Admin Url”
Step 4
$themepallette =@{ "themePrimary"="#9b59b6"; "themeLighterAlt"="#faf7fb"; "themeLighter"="#f5eef8"; "themeLight"="#ebdef0"; "themeTertiary"="#d5b9e0"; "themeSecondary"="#a569bc"; "themeDarkAlt"="#8e4ba8"; "themeDark"="#6e3a83"; "themeDarker"="#572e67"; "neutralLighterAlt"="#f8f8f8"; "neutralLighter"="#f4f4f4"; "neutralLight"="#eaeaea"; "neutralQuaternaryAlt"="#dadad"; "neutralQuaternary"="#d0d0d0"; "neutralTertiaryAlt"="#c8c8c8"; "neutralTertiary"="#d6d6d6"; "neutralSecondary"="#474747"; "neutralPrimaryAlt"="#2e2e2e"; "neutralPrimary"="#333333"; "neutralDark"="#242424"; "black"="#1c1c1c"; "white"="#ffffff"; "primaryBackground"="#ffffff"; "primaryText"="#333333"; "bodyBackground"="#ffffff"; "bodyText"="#333333"; "disabledBackground"="#f4f4f4"; "disabledText"="#c8c8c8"; } |
Add-SPOTheme -Name “Test Purple” -Palette $themepallette -IsInverted $false Here we can provide the theme’s name based on requirements.
Step 5
$site_script=@' { "$schema":"schema.json", "actions":[ { "verb":"applyTheme", "themeName":"Test Purple" }, { "verb":"setSiteLogo", "url":"Site Logo Url Path" } ], "bindata":{ }, "version": 1 } '@ |
Here, we replace the “Site Logo Url Path” with the link, where it is located in one of the document libraries.
Step 6
Add-SPOSiteScript -Title "TestSite" -Content $site_script -Description "Creates Test Site Script"
Here, you can change the Title and Description based on the requirements.
Step 7
Add-SPOSiteDesign -Title "TestSite" -WebTemplate "68" -SiteScripts "ID" -Description "Test Site"
Step 8
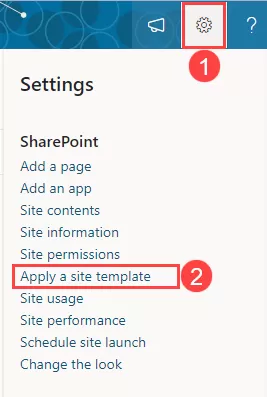
Now open existing the SharePoint site which we created in site tenant, we click on gear icon, then click on “Apply a site template”.
Step 9
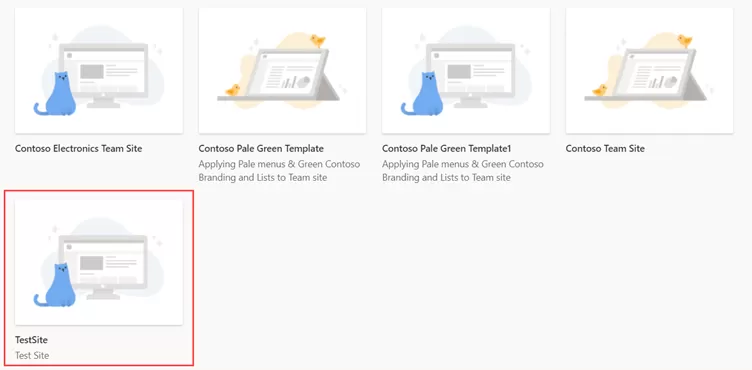
Go to “From your organization” and you can see your created customized template and use this template in the site.
Step 10
After selecting the template click on “Use template”. It can take a few times for apply template apply the template the the site.

I hope, this article will help you in building for your app.
In summary, we have created a custom template in SharePoint site.
Hope this helps!! Happy SharePointing!
Want to talk?
Drop us a line. We are here to answer your questions 24*7.