
This solution is used to display images of news banner images in Outlook desktop when sending news communication over email.
There are six ways to upload images for a news banner:
- Stock Images: When uploading images using stock images, we can view them in the Outlook web version and desktop version without any changes.
- Web Search: When uploading images using web search, they can be seen in the Outlook web version, but these images do not show in the desktop version.
- One Drive: When uploading images using OneDrive, only the user with access to that specific OneDrive can see the image in the Outlook web version and desktop version.
- Site: When uploading images from the SharePoint site, they can be seen in the Outlook web version, but these images are not displayed in the desktop version.
- Upload: When uploading images from the desktop, they can be seen in the Outlook web version, but these images do not display in the desktop version.
- From a Link: When uploading images using a link, if the image link is copied from a running site, the image can be seen in the Outlook web version, but it does not show in the desktop version. If the image link is copied from another SharePoint site, the image cannot be seen in both the Outlook web version and the desktop version.
These are steps to see the images in Outlook Desktop.
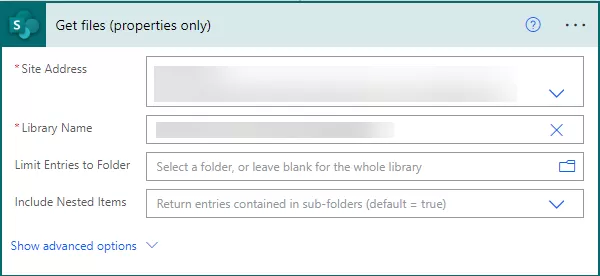
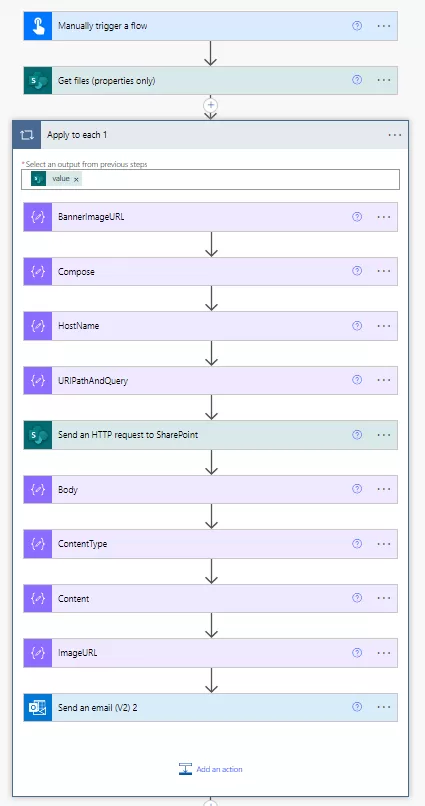
Step 1: Select the trigger “Get files (properties only)”, then choose the SharePoint site address and library name.
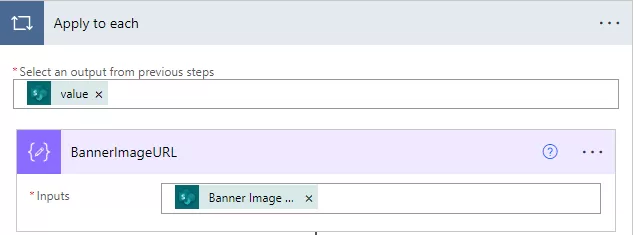
Step 2: Then added the “Compose” action. Add the Banner Image URL in the compose inputs. Once the banner image URL compose action is added, it will automatically add the apply to each action.
Step 3: Then added another “Compose” action. Input the output from the previous compose action with the ‘decodeUriComponent’ expression in the compose input field.
Decode URI Component” in Power Automate reverses URL encoding, converting encoded URI components back to their original human-readable form for accurate data interpretation or manipulation within the flow.

decodeUriComponent(outputs('BannerImageURL'))
Step 4: Then added another “Compose” action. Input the output from the compose action (BannerImageURL ) with the ‘uriPathAndQuery’ expression in the compose input field.

Value of the above action:
uriPathAndQuery(outputs('BannerImageURL')
Step 5: Select the ‘Send HTTP request to SharePoint’ action.
- Add the site address
- Add the method as a GET
- In the URI, add the substring expression with the output of (URIPathAndQuery) composed action.
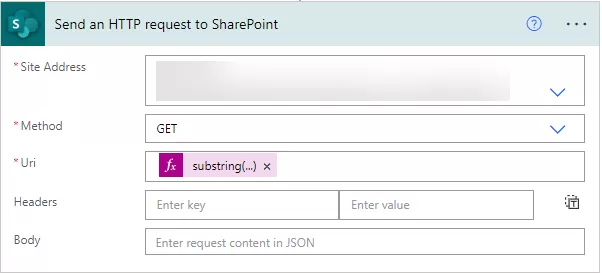
Value of the above action:
substring(outputs('URIPathAndQuery'),1)
Step 6: Then added another “Compose” action. In the input add body of the “Send an HTTP request to SharePoint” action.

Step 7: Then added another “Compose” action. In this compose we get the content type from the “Send an HTTP request to SharePoint” actions body.

Value of the above action:
outputs('Send_an_HTTP_request_to_SharePoint')?['body']['$content-type']
Step 8: Then added another “Compose” action. In this compose we get the content from the “Send an HTTP request to SharePoint” actions body.

Value of the above action:
outputs('Send_an_HTTP_request_to_SharePoint')?['body']['$content']
Step 9: Then added another “Compose” action. After the data add output of (“Compose-ContentType”) and after base64 add output of (“Compose-Content”) action.

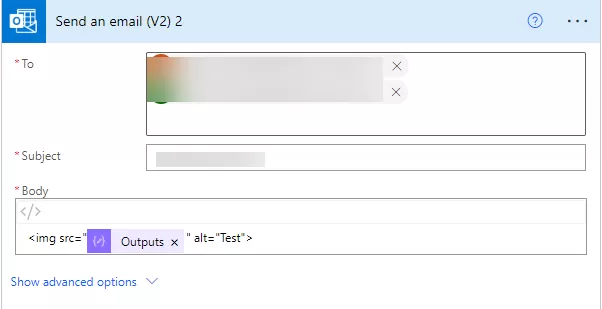
Step 10: Added action Send an email.
Add the email address of the user
Add subject
Add the output of (“Compose – ImageURL”) in the body.
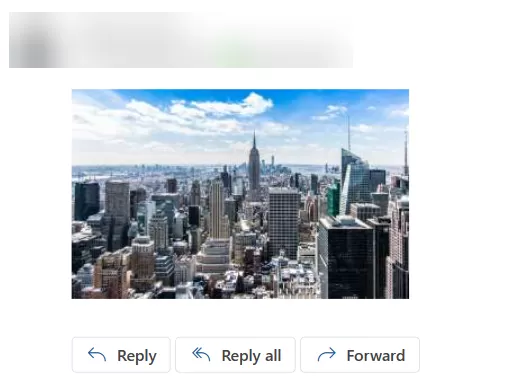
Output after running this flow
Step 11: The setup of the flow concludes in just a few simple steps.
Conclusion
Making news images show up properly in Outlook emails involves different ways of adding these pictures. However, each method affects how they appear on both the web and desktop versions differently. To see these images correctly in Outlook on your computer, we follow a step-by-step process.
This includes things like converting web addresses to show the right images, asking SharePoint nicely for the pictures, and figuring out what type of images they are. Finally, we put all this together and sent an email with the image link so that it shows up the way we want in Outlook. It might sound technical, but with these steps, we ensure that the images appear just right when you open your email in Outlook.
Want to talk?
Drop us a line. We are here to answer your questions 24*7.


