
In Microsoft’s Power Automate, crafting dynamic and personalized Word documents through templates has become a streamlined process. Let’s start the detailed steps that illuminate the path to seamlessly generating these documents using Power Automate.
Crafting Your Word Template
Step 1: Activating the developer option
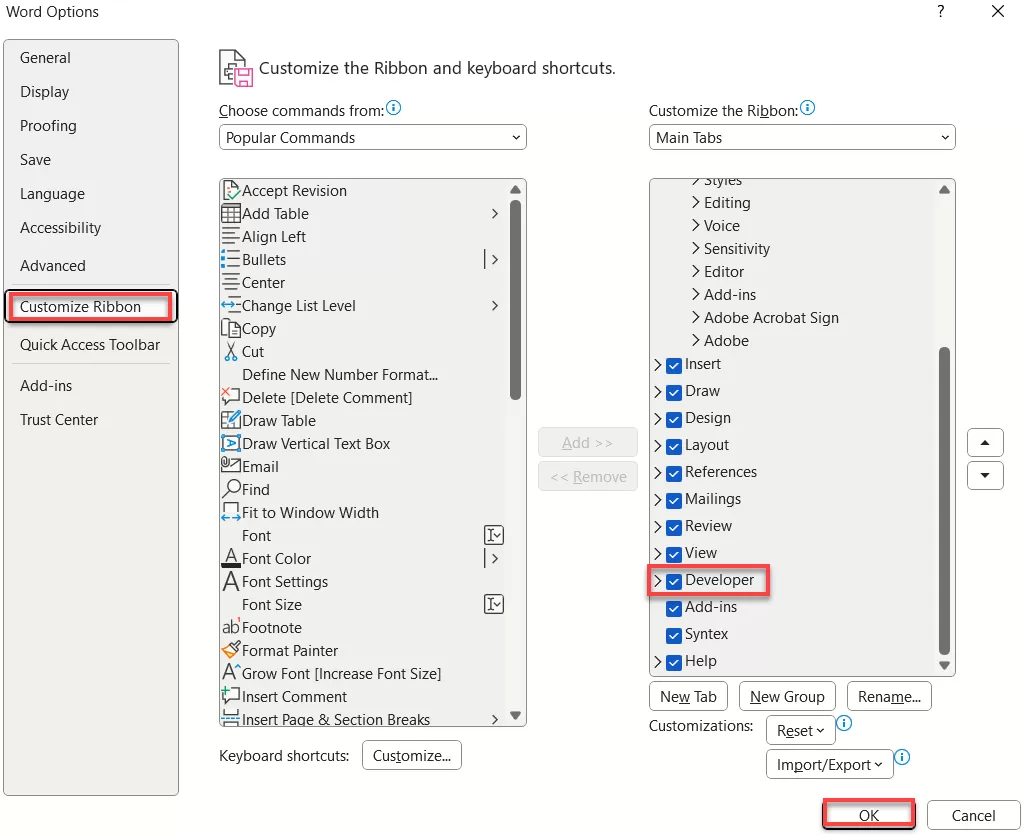
To begin, open up your Office Word application. Navigate to the “File” tab, then click on “Options.”

This leads to the “Customize Ribbon” tab, where you activate the “Developer” option by checking the designated box. This action grants access to the Developer tools on the application’s homepage tab.
Step 2: Incorporating Dynamic Content
Enabling the Developer option facilitates the use of the “Insert Plain Text” control, allowing the inclusion of dynamic content. Then after Create a template according to your needs.

(Highlighted is the “Insert Plain Text” option)
Utilize this tool to add fields, such as “Name,” for dynamic content within your Word template. Navigate to Developer, select the text you wish to make dynamic, and click on the Highlighted Icon for the desired effect.

Step 3: Uploading to SharePoint
Once your template is created, ensure to upload it to the SharePoint library for accessibility and seamless integration.

Developing a Flow in Power Automate
Step 1: Setting Up the Flow
After uploading the template, configure a manual trigger flow. Incorporate necessary fields, like the person’s name, ensuring you’re effectively setting the stage for dynamic input.

Step 2: Populating the Word Template
In the ‘Manually trigger a flow’ section, include the action called “Word.” Then, select ‘Word online (Business),’ where you’ll find the “Populate a Microsoft Word template” action.
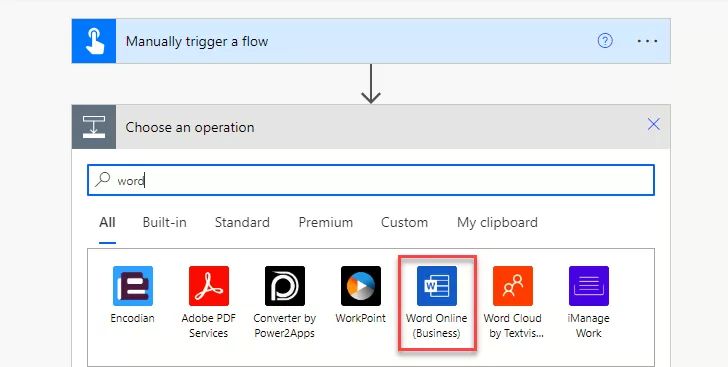
(Search for “word”)
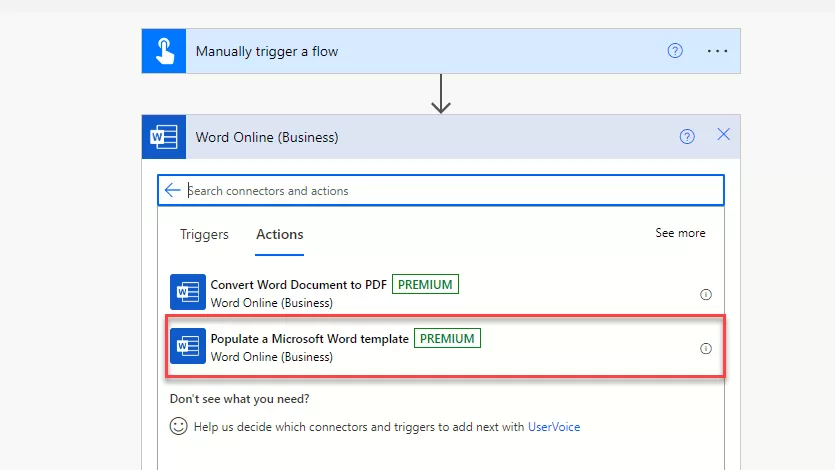
(Select action called “Populate a Microsoft Word template”)
Select “Populate a Microsoft Word template” action and Put in the important info about where your Word template is in SharePoint. Then, pick the Document library and select the template file. Use the manual trigger field to keep things changing.
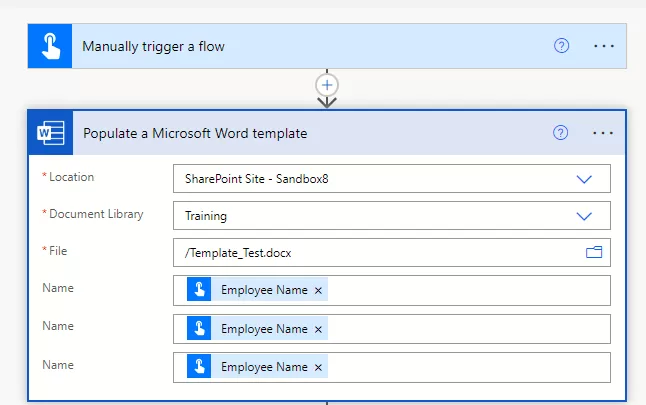
(Consult this step for the action called “Populate a Microsoft Word template”)
Next, choose ‘Create file’ action and where you want to keep the new Word files created. You can even give them a special name like “Offboard_Employeename.”
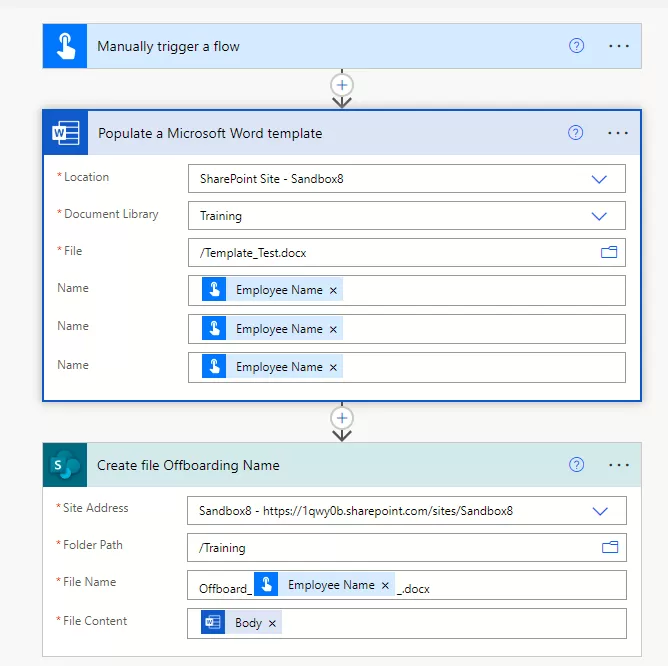
(Consult this step for create file)
Step 3: Initiating the Flow Manually
Once the flow is set, manually initiate it. This prompts the input of the person’s name, seamlessly integrating the dynamic element into the document.
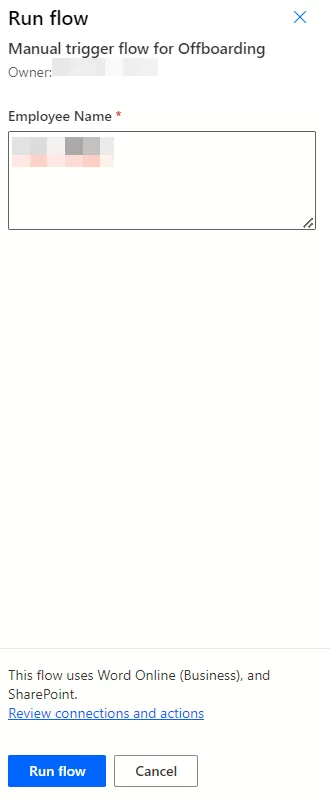
Step 4: Generating the Word File
Upon execution, witness the magic as the file, named as per the flow, is automatically generated in the SharePoint document library. Open the Word document to observe the dynamic change, showcasing the effectiveness of Power Automate.

(Generated File the SharePoint document library)

(Updated Content of Word File)
Conclusion – Creating Word documents from templates within Power Automate empowers users to streamline and personalize their document creation process. By following these steps, one can harness the full potential of Power Automate’s capabilities in generating dynamic and customized documents effortlessly.
Want to talk?
Drop us a line. We are here to answer your questions 24*7.


