
Follow these steps to set up the form responsiveness:
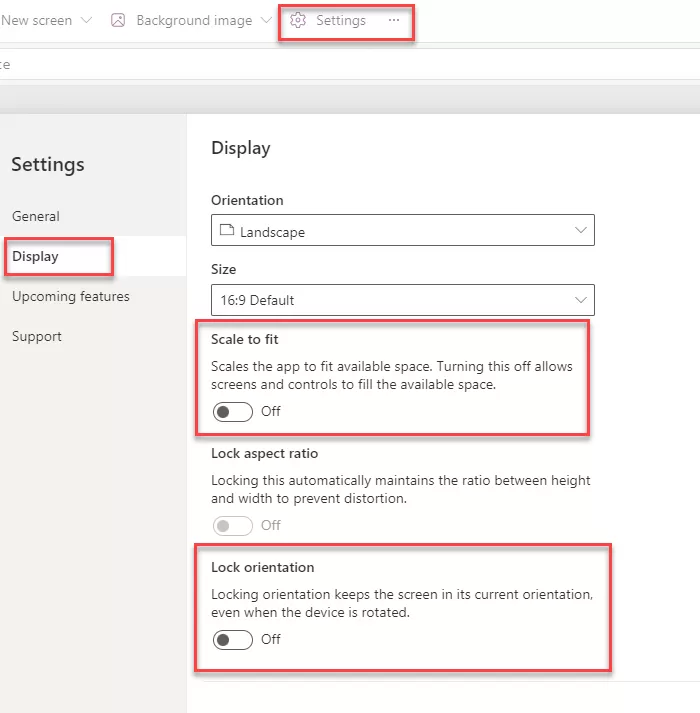
- Open the power apps and click on the setting.
- Go into the display settings and turn off the “Scale to fit” feature. Make sure that “Lock Orientation” and “Lock Aspect ratio” are disabled.
Responsive Form with Form controls.
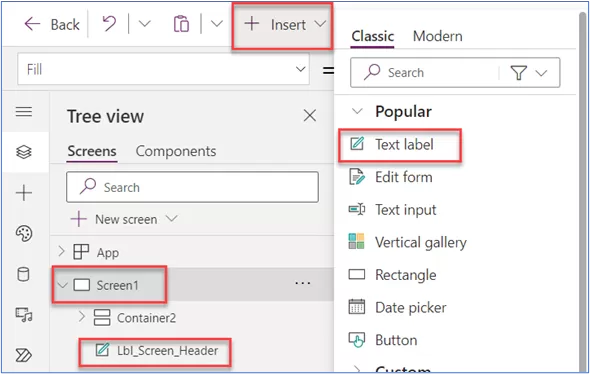
Step 1: Click on the “Insert” icon and add the Text label property as shown in the below image. And Adjust label name according to the requirement and adjust the height and width of the label. Also changes the text as per the requirement.
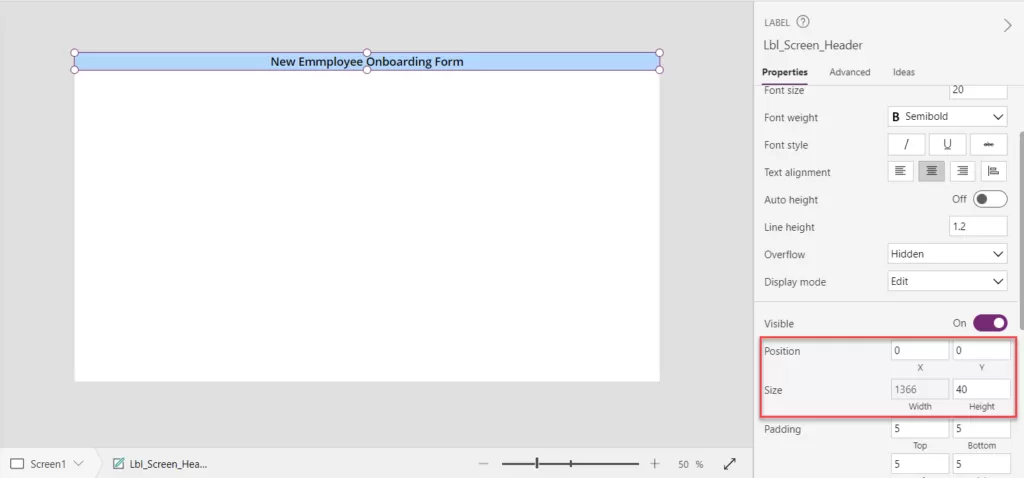
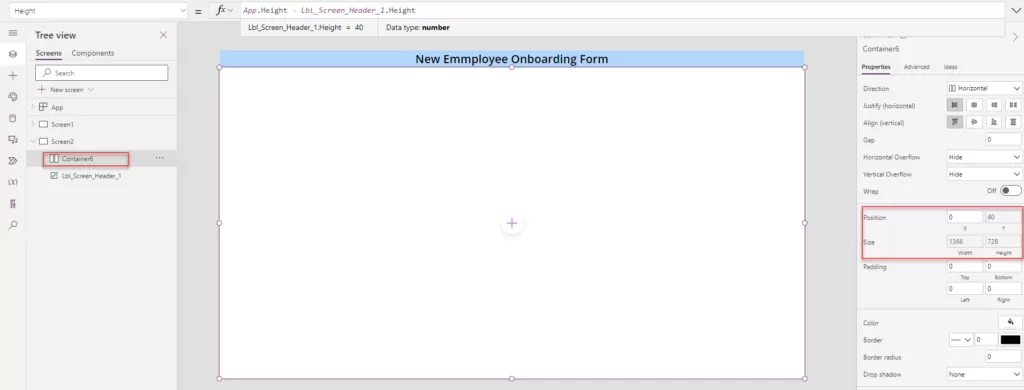
Step 2: Create a new blank screen and insert a horizontal container onto the screen. Set the container’s height to match the previous specifications. In this method, the horizontal container is directly added as we’re utilizing Power Apps’ default form control.
- Width:Width
- Height:Height – Lbl_Screen_Header_1.Height
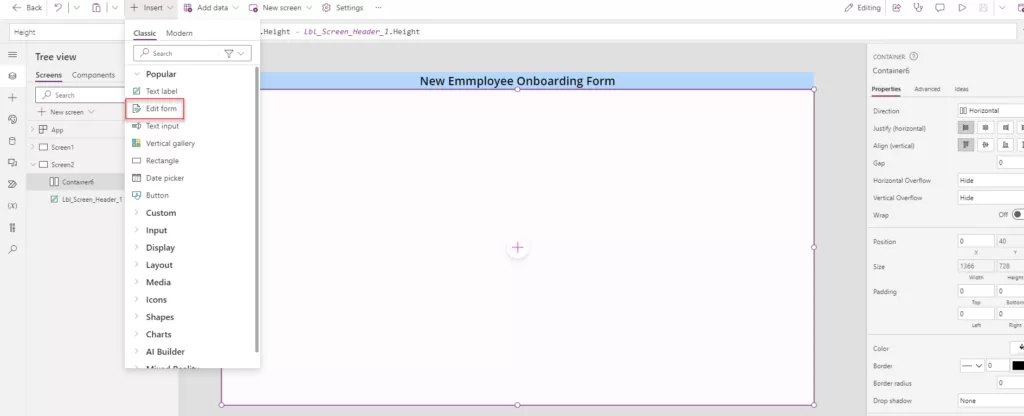
Step 3: Click on the “Insert” button and select the “Edit form” option, following the image reference provided. Ensure that you choose the Horizontal container and subsequently place the form inside this container.
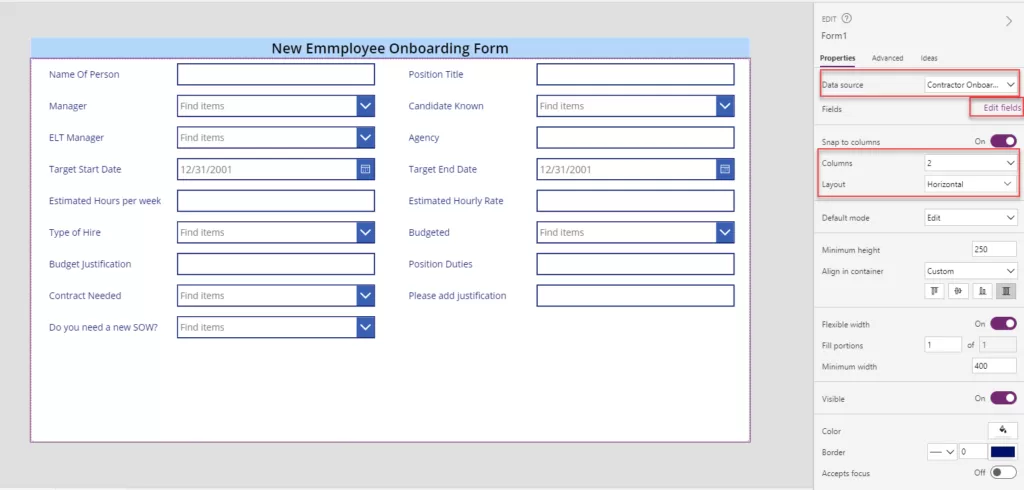
Step 4: After adding the form and linking it with the data source, modify the form’s properties by setting the number of columns to 2 and choosing a horizontal layout. If you wish to omit certain fields or rearrange their order, access the “Edit fields” option located in the image below.
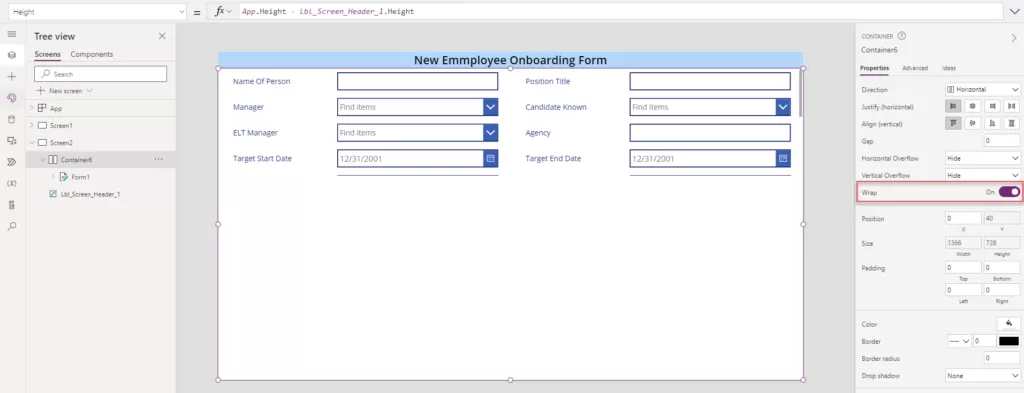
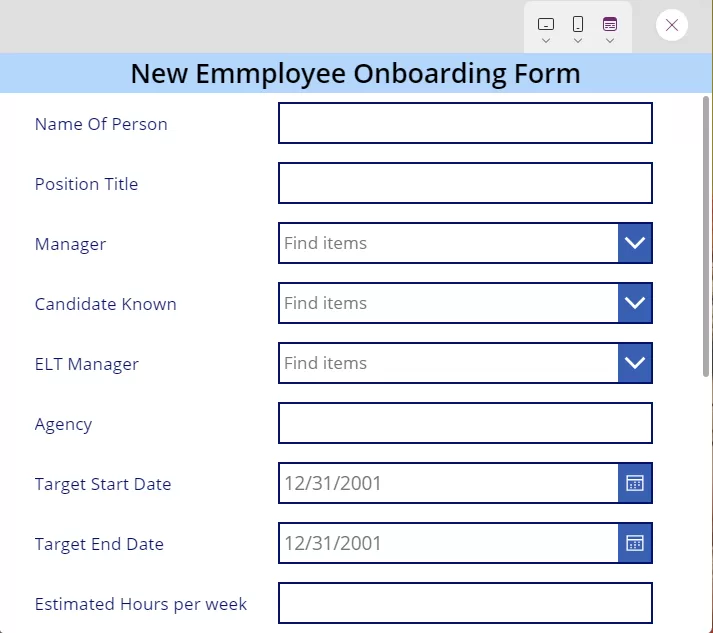
Step 5: Enabling the “Wrap” control for the form will result in the appearance depicted in the image below. This occurs due to the form’s minimum height being set to 250. To utilize the entire form space, a formula can be applied.
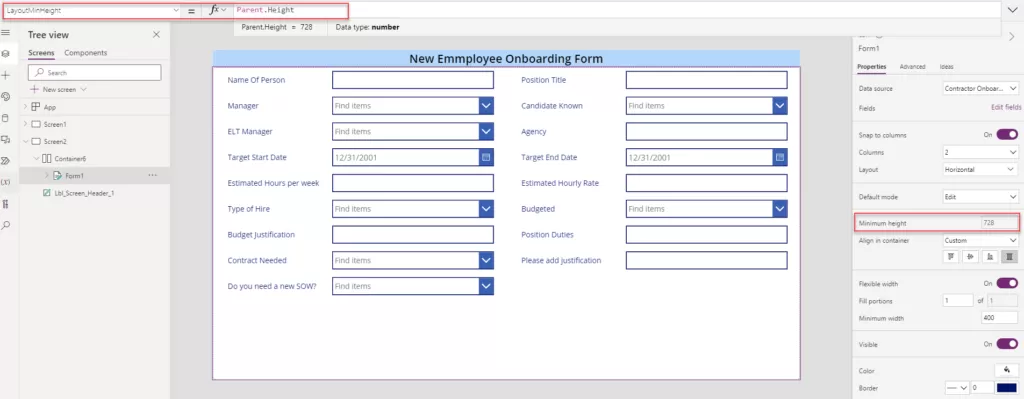
Step 6: Let’s incorporate the logic for the form’s minimum height by including the specified height within the formula provided below.
- LayoutMinHeight: Parent.Height
Step 7: Upon minimizing the browser window, observe how all controls automatically adapt and adjust according to the screen size, ensuring optimal responsiveness.
Want to talk?
Drop us a line. We are here to answer your questions 24*7.


